Draft
Let customers add a name, choose artwork or pick a colour on the product page itself — and then, when the order arrives, receive a print-ready file rather than a note telling you to rebuild it yourself.
This is the most involved part of the dashboard, because it does not describe "this product accepts a name" but what is printed where, and which control changes which layer. This chapter follows the order you have to build in.
The model: two multiplications
The whole feature fits in two lines:
product base  ×  design      =  template
template      ×  option set  =  bound to a product
| Concept | What it is |
|---|---|
| Product base | A product photo (the mockup) plus the print area on it |
| Design | Positioned layers: text, curved text, image slots |
| Template | A base joined to a design — the thing that is actually printed |
| Option set | What the customer sees: the options, their values, and the surcharges |
| Library | A copy of an artwork set for one "finish" (gold/silver…) |
The reason for two multiplications is reuse: one design works on several bases (shirt front, shirt back, bag), and one option set works on several templates. You do not rebuild everything for each product.
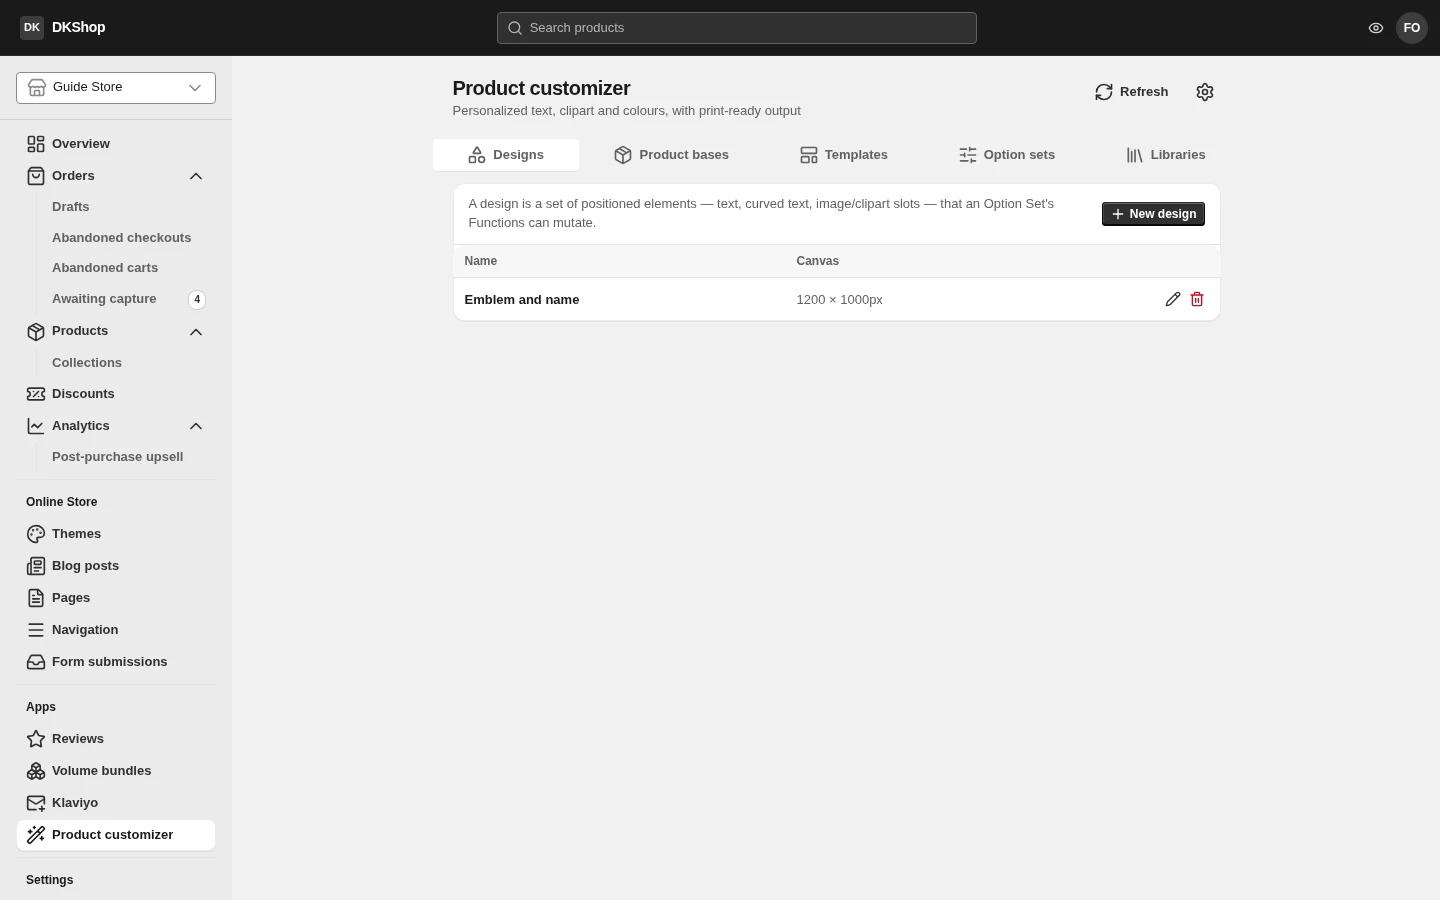
These five tabs cannot be bookmarked individually. Unlike Settings → Checkout, the tab is not in the URL here, so reopening the page returns you to Designs.
Functions: what connects a control to a layer
This is the decisive concept, and it lives on the value of an option, not on the option.
Each value carries one or more Functions, and each Function says exactly one thing: set property X of layer Y to Z.
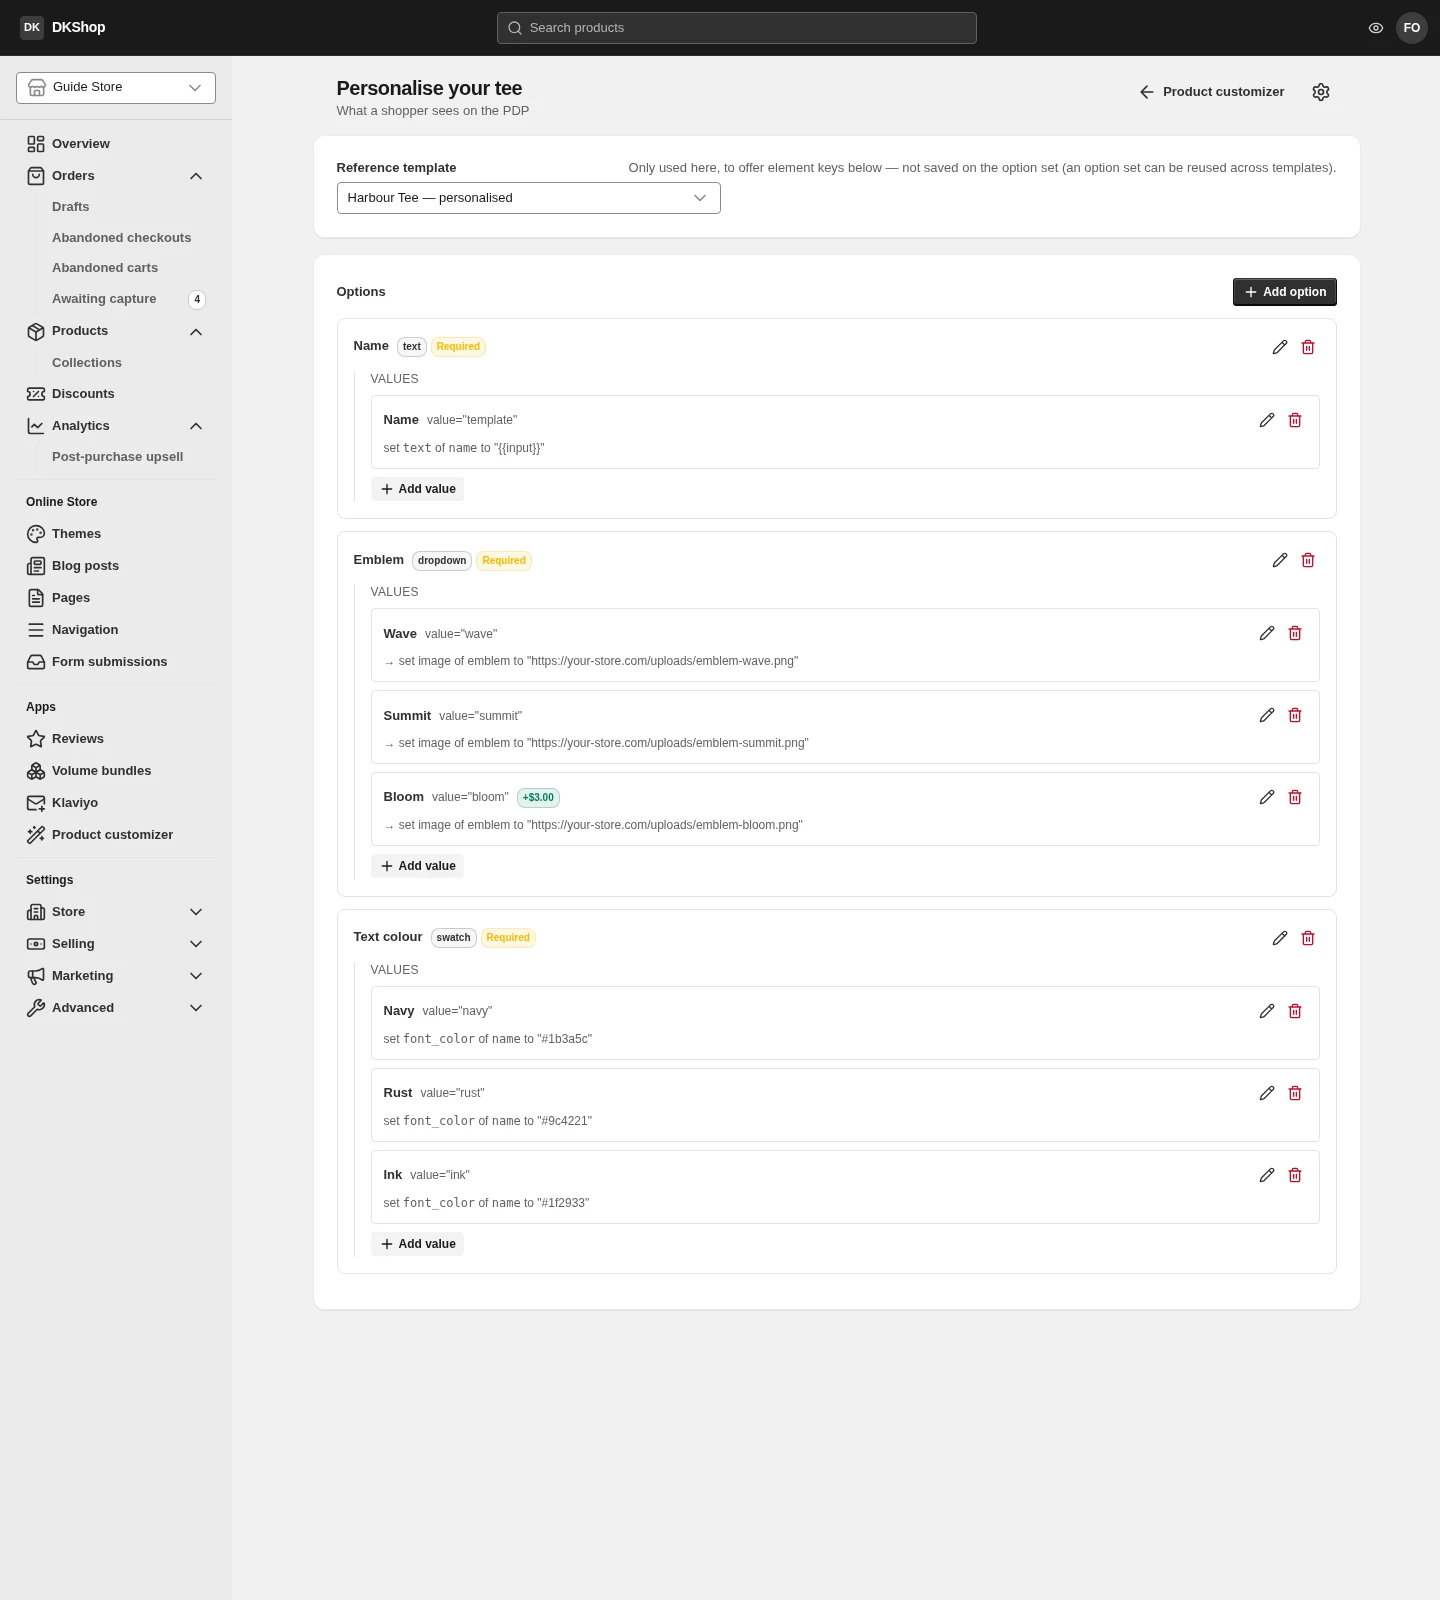
The screen prints them out literally:
set text of name to "{{input}}"set image of emblem to "…/emblem-wave.png"set font_color of name to "#1b3a5c"
Those three are three different kinds of Function — text, image, colour — and all
three address a layer in the design by its layer name (name, emblem).
There is a fourth kind worth knowing, because it does something the others cannot:
visible. It changes no content — it turns a layer off entirely. A value of
false hides it; anything else shows it. This is how a control like "how many pets?"
switches on one arrangement and switches the others off, instead of you having to
build each arrangement as its own design.
{{input}}is how a text field worksA text option still has to have exactly one value, which looks absurd until you see its Function:
set text of name to "{{input}}". That value is a template, and{{input}}is where the customer's typing is substituted in.Without the template, the input has no idea which layer to pour text into.
A wrong layer name is the worst kind of mistake in this feature, because nothing reports it: when printing, a Function pointing at a layer that does not exist is skipped — the file the factory receives is missing a layer and nobody knows. That is why this screen shows "— not in the reference template" beside a wrong Function, and why the Reference template field at the top exists at all: it tells the page which design to check against. That field is not saved onto the option set — one option set is shared across several templates.
The order to build in
The five tabs are in dependency order, so work left to right:
1. Product base — create the base, upload the mockup photo, then drag the print area onto the right part of it. The print area is the rectangle the design will sit inside.
2. Design — set the canvas (1200×1000, say), then add layers. Each layer has a
layer name — this is what a Function will call it by, so give it a readable one
(name, emblem) rather than leaving the default.
3. Template — join a base to a design, choose the PPI (300 is print standard) and the export format (PNG or JPG).
4. Option set — add options, add values, and give each value its Functions. Pick a Reference template first so the page can check layer names for you.
5. Bind it to a product — this step is not here: it is in the product editor, in the Personalization block, where you choose a template + option set for that product.
Step 5 is also the checkpoint: it is where every layer name in the option set is checked against a real design, so a typo is caught there rather than becoming a missing layer in a print file months later.
Pricing
Three ways to add money, and they stack:
| Way | Where it is set |
|---|---|
| Per value | Each value has a surcharge field — this artwork +$3, that one free |
| Per character | On a text option: how much each character the customer types adds |
| Per colour / per layer | On the template: how many colours (or layers) are included, and what each one beyond that costs |
There are also quantity tiers on the template: from N units, the whole surcharge is replaced by a flat amount per unit — for wholesale orders.
The surcharge is re-derived every time the basket is read, never stored. So editing a value's price re-prices every open basket at the new price; no basket is stuck at an old one.
Validating what the customer types
A text option can set: a maximum length, a number of lines, characters per line, and a character class — anything · digits only · letters only · or a blocking expression.
The expression is a blocklist, not a required format: it rejects a matching string. It is the place to block profanity, not the place to enforce a format.
The rules run on the server, not only in the browser. Typing too much is reported on the page immediately, but even somebody calling the API directly is refused with the same sentence — "must be 12 characters or fewer", "letters only".
The platform switch
This feature has a platform-level switch, and it defaults to off. A store without it sees a warning band at the top of the page: you can still build designs, bases and option sets, but customers see nothing at all.
If you have built everything and the product page shows no personalization, check two things in order: that warning band, and then the Personalization block in the product editor.
Reference
| Tab | Holds | Notes |
|---|---|---|
| Designs | The canvas and its layers | The layer name is what a Function addresses |
| Product bases | The mockup photo and print area | One base can have several mockups |
| Templates | base × design | PPI 300 for print; PNG or JPG |
| Option sets | Options, values, Functions | Reference template is for checking only, not saved |
| Libraries | Artwork sets per finish | For products with several "finishes" |
| Concept | What to remember |
|---|---|
| Function | set <property> of <layer> to <value> |
{{input}} |
Where the customer's typing is substituted, in a text option's template value |
| A wrong layer name | Skipped at print time, with no error — the checkpoint is binding to a product |
| The binding | Lives in the product editor, not here |
| The platform switch | Off by default; off means customers see nothing |
Next: back to the index for the other chapters.
Verified against 9eab6cc1c222 · 2026-08-29